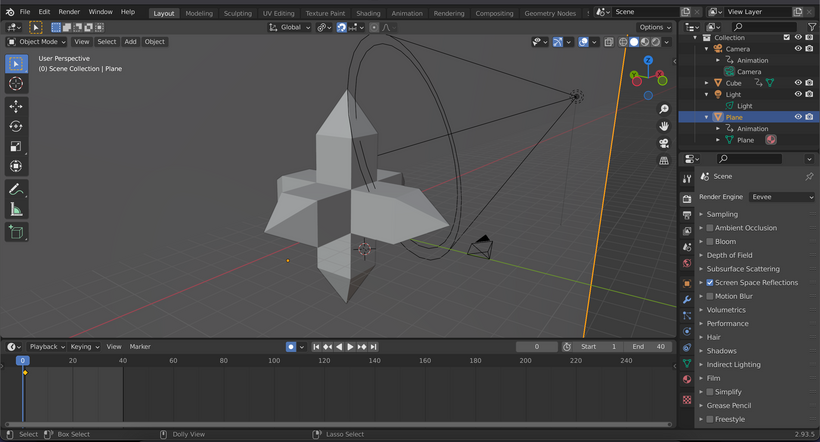
The layout workspace is the workspace in Blender where you’d do most of the layout (positioning) work for the different elements that will be part of your final render.

A screen like this is a lot to a beginner, but it makes a lot of sense:
- In the main screen, you set up your elements and work with them
- I have also played with some mesh (“object”) modification, so I could extend and model some strange objects, outside of the basic shapes (protip: learn to love the extrusion)
- To the right, you organize everything in collections (very similar to layers in other programs, but hierarchical)
- To the bottom right, you configure the properties of the selected objects. Careful here: you can also modify properties for global objects, which is not immediately obvious at first.
- At the bottom, you can play around with frames and keyframes, which you might get from other programs too. Basically, set what a property should be at a particular point in time, and Blender does the magic in the middle.